Are you getting the most out of your nutrition? You may not be, and one way that you see athletes, in particular, getting around this common pitfall is by pre-preparing their meals. By doing this, you can reflect on what your body needs in your cooking, and have some really tasty meals at the same time.
It doesn’t even have to be about being healthy either! Meal prepping can actually be a great way to save money on keto-friendly recipes. Also, we have all been there at work, watching a colleague open up a glistening Tupperware box to reveal a delicious looking lunch, and then staring in despair down at our hastily purchased shop bought sandwich. Well, meal-prepping is a great way to prevent that ever happening too. Here is our step by step guide to meal prepping.
Step 1. Start With You

The best place to start when preparing your meals is by thinking with consideration about what your body needs. Do you want to gain muscle? Make sure you stock up on protein. Do you run a lot? Maybe you need a diet that is mostly carbs. Are you trying to lose weight? Maybe your meals should avoid sugar. What you want to get out of your food precedes all and helps you make decisions because food is your fast way to fitness.
Step 2. Do Your Research

TThe next step is working out what kind of stuff you want to eat. Collect a list of recipes, many of which can be found on our online recipe section, for the three square meals (breakfast, lunch and dinner) and make a note of all of the ingredients (especially the common ones so you don’t overbuy), and use it to build a week by week schedule of things to eat on those three square meals. Also consider snacks too.
Step 3. Priming The Pantry

Before you so much as even touch a chopping board, you should spot out all of the spices and herbs that are listed in your different recipes as well as oils and kinds of vinegar etc. You should then make it your business to do like Pokemon and catch them all. That way you’ll have months of meal prep ability readily available from one cupboard.
Step 4. Work out Your Shop

So now that you know what you want, and you are packing more spices than the silk road, you can go out and buy all of the ingredients for the first week of your schedule...BUT WAIT! Be sure to have a look online and see what your local shops offer and what ingredients you may have to buy at others because they might not have all you need in one place. This also serves as a great tool to price check and compare to work out the best deal for you!
Step 5. Always Have a Plan B

Unless the place you do your shopping the internet, you are always going to run the risk of getting to the shops to buy your ingredients for a week, only to find that they don’t have what you need for a given meal. Now to save you the trouble of collapsing in a ball and weeping into your sleeve on the shop floor, you should always have a backup recipe ready for that case.
Step 6. Freezing Cost

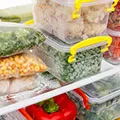
Step 6. Freezing Cost - After you have kicked your prep plan off and are consuming all of your wonderful meals, you might find that you have a lot of leftovers from the food prep and cooking processes. This isn’t a call to pig out or throw things away on mass. You should freeze your leftovers and you can always re-use them. One good way of doing this is to plan your meals for Monday through Friday, and then save the weekend for leftovers. This is not only easy, it will also save you a shed load of cash and years of life that you would have otherwise squandered away on takeaways and unneeded ingredients.


